This Tutorial is for the Quick Quilt Saturday Group on Facebook -- I will update my blog about my other projects tomorrow!
Here is the tutorial:
You need
1 piece of fabric cut 14 x 18 inches
1/4 " Ribbon 30" inches
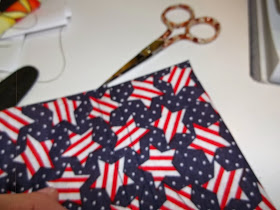
Here is my fabric 14 x 18 inches
Fold fabric in 1/2 it should measure 9 x 14 inches -- You will sew on the short seam -- in this picture it is the bottom where the fabric meets
Then press seam open and lay it with the seam in the back -- now measure down 2 1/2 inches - make sure it is even and sew a 1/4 inch from the bottom and them a little larger than a 1/2 inch above the first sewing line -- this makes your casing for your ribbon
Here it is sewn up and a picture from where your back seam is -- You now need to sew across the bottom of the tissue cover.
After the bottom is sewn you will make a box bottom - spread the bottom open and I press only 1/2 of the seam allowance now and the other half when I am measuring the other side. One you have it spread out like this measure 2 inches from the tip of the triangle. Mark it with a pencil then lay your ruler down and draw a line -- this will be your stitching line --do the same to the other side -- this will make your bottom square
Here is a picture of it open with the pins -- ready to sew at this point
Here it is sewn -- sew the blue thread -- BEFORE you cut off the points make sure it is a nice bottom, try putting your tissue box inside -- after of course you turn it right side out! - It will be a bit snug and that is ok.
Now once it fits -- cut off your corners - your box will sit nice and steady on your table or desk
Now it is time to make a little snip in the casing -- you will do this in the front (opposite side from the seam) Try to center it and when making your snip be careful to only go thru the top layer -- if you go thru both layers it is not the end of the world -- The next step is to thread the ribbon thru -- I use a large eye needle but you could use a safety pin it you prefer
Then put in your box of tissues and tie a bow! I am ready for the 4th of July!
This one matches my sewing room I hope you enjoy making these, they make great inexpensive gifts.


I love this, but i’m Confused,please help. If you fold in half and sew on the short seam- is that the bottom or the side? I do not see how to open it up to iron either way, but I am one who needs more pictures.(I also have a bone disease of the skull) I quilt fine but sometimes now there are some items I just can’t see in my minds eye. Thank you for your help.
ReplyDeletePaula Azevedo
bodegagirl@me.com
It’s the side then you have a round circle . Then you fold in half and make sure Seam is on top in the middle of circle and press seam open
DeleteI think she means side seam not short seam---which she has towards the bottom in that picture
ReplyDeleteLove this... I live in a Northern Illinois village of 1900: Richmond. Thanks for the instructions!
ReplyDeleteHorse shit directions. Could not make heads or tails out of directions. Pictures did not help at all.
ReplyDeleteRude. Read slowly and more carefully. I have dementia and had no problem after second attempt. ♥️
DeleteI have read instructions of this project from several different presenters and yours was excellent.
ReplyDeleteThanks for taking your time to post. It is exactly what I was looking for. You know, some people are spoiled and never happy! No need to be ugly and profane though.
ReplyDeleteUnfortunately I made this before measuring my tissue box. The tissue box measures 17 1/4 inches around. Clearly 18 inch length isn’t enough with a seam. It was too small so now it’s trash.
ReplyDeleteI love this quick project idea.
ReplyDeleteI make these with various fabric designs for the holidays. A big hit at craft fairs. Thanks.
ReplyDelete